This is in continuation to the N900 review that I posted earlier (https://bandla.wordpress.com/2010/03/02/nokia-n900-first-impressions/). The history of Maemo 5 and N900 was explained in short in the earlier review. I will be diving straight into the review of Maemo 5 this time.
Home Screen and customization:
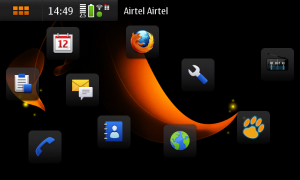
This is how the Maemo home screen looks like. Similar to Linux desktop, Maemo 5 has 4 home screens which are totally customizable. After some customization, here is how my Maemo home screens look like:
You can move around by swiping across the display (horizontally). These home screens are tied in panoramic view which means swiping right from Screen 1 takes you to Screen 4 and swiping left from Screen 4 takes you to Screen 1. And the action is very slick and fluid without any lag while swiping. Even when there are handful apps were running, there seems to be no lag here.Unlike Symbian home screen, there is no limit to what you can put on Maemo Home screen.
On the top left corner, there is an icon that takes you to Symbian styled menus. At the centre of top bar, there is digital clock, Signal, battery level, online status indicator and Network provider name.
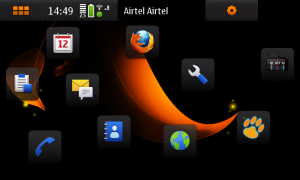
So, how to customize the home screen? A tap on the screen (anywhere) shows a gear style icon at the top
A tap on this icon opens up customization mode and top menu gives couple of customizations options.
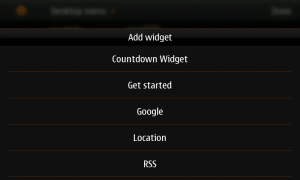
Shown below is the snapshot of Home screen’s Top Menu.
These are the operations that you can do from Desktop Menu:
- Remove existing icons of apps from Home Screens. Each icon has “x” on top right corner clicking on which removes the icon from home screen.
- Move icons around the four Home Screens. Holding an icon and dragging it horizontally across moves it to adjacent home screen. This is one action that is not as fluid as seen in iphone OS. Sometimes to move the icon across two screen, I had to drop the icon in adjacent home screen and move again.
- Add shortcuts for installed apps. As shown below, clicking on ‘add shortcut’ gives a list of all the apps that are not yet added to home screen. This means that once the app is added to home screen, it is removed from the ‘add shortcut’ menu.
- Add contacts. Contact home screen icons can be used to call or text.
- Add bookmarks.
- Add Widgets. Not many widgets are available right now for Maemo 5. Weather and pedometer widgets are my favourites though and they work very well and show real time data very well. Do remember that having widgets that connect to data networks for real time info (RSS feed, weather apps etc) can reduce battery life.
- Change Background and Themes
- Manage views. This options lets you select how many home screens you can have. Do remember that once you uncheck a home screen, the icons on that home screen will be cleaned up too. To be precise, those icons will not be moved to adjacent home screens. You need to add those icons again to any of the remaining home screens and enabling the home screen will not bring back the configuration done before deactivating the home screen. Instead, it gives you a clean home screen. So, in this mode, do be careful in what you are doing as a wrong touch can make you pull your hair out. The following snapshot shows the views setup window. A tap on tick mark disables the respective home screen on desktop.
One problem that I have noticed here is that while in customization mode, it is not possible to move across screens, which I would consider as a simple design flaw that can be fixed. To move to next home screen, I have come close customization mode and move to home screen and go to customization mode again. Now that the number of apps are minimal, this is not much of a pain but when I have a huge list of apps added to home screens, it can be a pain to do the reorganizing of apps. Also, a pop up asking whether to remove the icon from home screen when ‘x’ is clicked would have been a nice option to have. Reason is that sometimes, I used to click on ‘close app’ accidentally while selecting the icon to move.
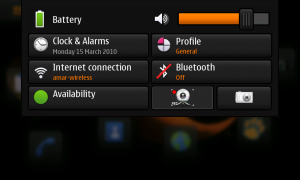
While in Home screen, the top menu doesn’t show any drop down menu but instead shows a cluster of tiny icons, clicking on which you will get the options to change settings like Profile, Availability, Internet connection, Alarms etc and the following snapshot is self explanatory.
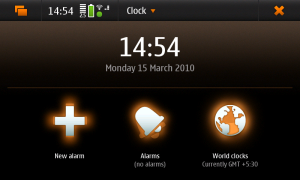
Clocks & Alarms: selecting this options shows the following menu from where you can add/edit alarms, set world clocks and change time/date and timezone. From this menu, you can add or remove alarms, set world clocks and change date/time for the phone. Extremely easy to use inteface which is catchy too.
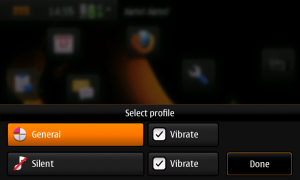
Profile: Not much options here. All you can do is on/off vibrate, change profile to General or Silent.
Internet Connection: Swap between wifi networks and 3G/GSM networks
Availability: changing this will change your status in networks like Gtalk and skype. Also, you can enable GPS here to allow others to know where you are all the time as long as the option is enabled. But this can drain the battery real fast.
Conversations/Messaging:
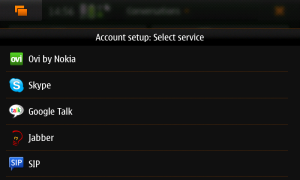
This is one area where N900 really excels. Accounts from Ovi, Skype, Gtalk, Jabber and SIP can be integrated into messaging section.
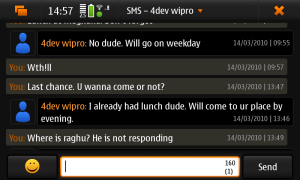
Conversations are sorted based on names instead of timeline. This makes it easier to continue texting with buddies or to search for old texts. As you can see from above snapshot, in converstations mainpage, youc an see the threads going on and also tabs to send new SMS or new Instant Message (IM). The left column helps you identify whether the conversation is IM or SMS conversation. Yellow (letter style) icon denotes SMS based conversation and white color icon denotes IM based conversation. For IM conversations, right column shows the current status of your buddy (offline, online, idle), account type (gtalk,skype etc) and photo. The centre column lists buddy name and last message sent/received. All in all a very well though out design.
When in conversation mode, top menu lets you change settings, add accounts and delete conversations and send IM.To come out of the menu, just tap on greyed out area on the display and you will be back into conversations list.
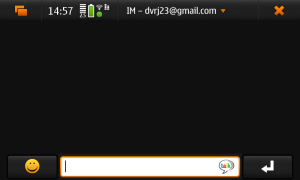
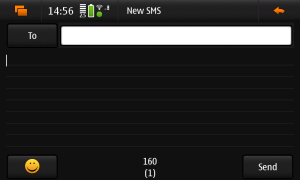
Thanks to the qwerty keypad, large screen and intuitive conversations UI, Texting and IM has never been easier. The below two snapshots shows writing IM and writing text.
convesations with a buddy is sorted in timeline mode as shown below:
This makes it very easy to track your conversations (be it on IM or through SMS) very easy. Actually, it’s lot lot better when compared to Nokia’s own Symbian SMS center.
Accounts: This section allows you to control you accounts and add/remove accounts. Would have loved to see more accounts here like Yahoo and MSN. All you need to do is to select the type of account that you want to add and provide respective userid and password. And all your IM contacts from the account will be listed in IM contacts.
Following snapshots will give a brief idea on how easy it is to setup IM account in conversations:
1) Select new from accounts menu
2) Select gtalk account from list of available account types
2) Add username and password and you are done setting up new account
The above snapshot shows contacts list in conversations. ‘0dummy1’ is phone contact on SIM and “devaraj N” is IM contact.
Contacts:
This is how the Contacts menu looks like.
Since I have not added pictures to any contacts, a blue icon is showing in far right column which will usually show the picture of contact. From the top menu, you can do tasks like Adding or removing contacts, import and export contacts, add/remove groups etc. The contacts can be sorted based on Name or history of conversations and surprisingly, based on current online status :). If you have added Gtalk or other IM ids for the contact, the right column will show whether the contact is online in any of the networks or not. The amount of detail that can be added to contacts here is overwhelming.
To edit contact detail, click on the drop down menu showing contacts name and select Edit. There are many other options like Merge/delete/send contact.
The following is snapshot of Contact’s top menu from where you can add or remove contacts, group contacts, add your information, export/import contacts and change settings:
You can keep your detail like phone number etc under ‘my information’ which you can use to send a e-business card to your buddies
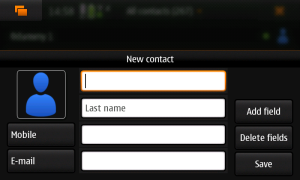
Adding a new contact is fairly simple and can be initiated from top menu. You can add the following fields to a contact:
- Name
- Mobile
- Wired Line
- Email, webpage
- Gtalk, Jabber, Ovi, SIP, Skype ids
- GPS pointed Address (home and work)
- Gender, nickname and job title
- Birthday
- Note
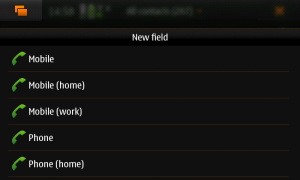
The basic add new contact windows gives you option to add contact name, mobile number and email but you can lot more info by clicking on “add field” tab and here are few snapshots of what fields are available to add:
Isn’t it a truckload of info that you can add to your contacts/buddies? You never need to look elsewhere to find ways to communicate with your buddies.
From the contact menu, you can click on communication history to see the complete history of texts/call/IMs done with this contact and continue a conversation or call from there.
When compared to older Symbian Contacts menu, the amount of options and customization in Maemo 5 is simply mind-blowing. Though there is whole lot of information that can be added to the contacts list, everything is so simple that it takes no time at all to get used to. However I search, I am not able to find any drawbacks or design flaws in this section. There is no need to install different IM clients or apps to reach your buddy. Everything is put in one place and hats off to the Maemo team for this. I would rate this 100/100!
Calling:
Clicking on “make a call” icon shows a list of recent calls (incoming,outgoing and missed) and two tabs to open Dial Pad or Contacts list.
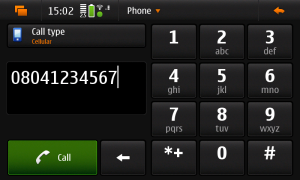
This is how Maemo’s dial pad looks like:
Taskbar shows “Phone” top menu from where you can clear timers, calls and set accelerometer settings for Call section and let add accounts like Gtalk and Skype for VoIP dialing.
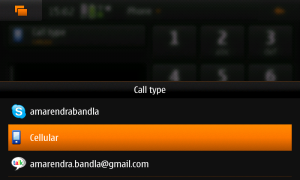
In the Dial Pad, you can select whether you want the call type to be a Skype/gtalk call or a Cellular call. Can’t stop saying this again and again but integrating social networking and VoIP wherever possible is a really good option to have in Dial Page.
One surprise here is that selecting a contact shows you option to either call using GSM network or using VoIP (skype).
This is how the incall windows looks like and as usual, the options are pretty simple. loudspeaker on/off, mic mute, dial pad and end the call. The top menu “call” lets you initiate a new call or merge calls.

To be Continued … (app manager, browser, camera, multitasking, calendar, media player, photo manager, conclusion).
















Great review, especially the effort to detail and the myriad of screenshots. Nicely done 😀 (a few typos, but that can always be overlooked 😉 )